Luxury Vinyl Tile (LVT) has surged in popularity over the past decade, becoming one of the most sought-after flooring solutions for both residential and commercial spaces. Among the many design variations, LVT in a herringbone pattern stands out for its timeless elegance and design versatility. Combining the durability and practicality of vinyl with a classic wood-inspired pattern, herringbone LVT brings a sophisticated visual appeal without the typical drawbacks of traditional hardwood.
In this post, we’ll explore what makes LVT herringbone flooring special, how to choose the right product, installation tips, design ideas, maintenance strategies, and practical recommendations to ensure your flooring looks beautiful and performs well for years.
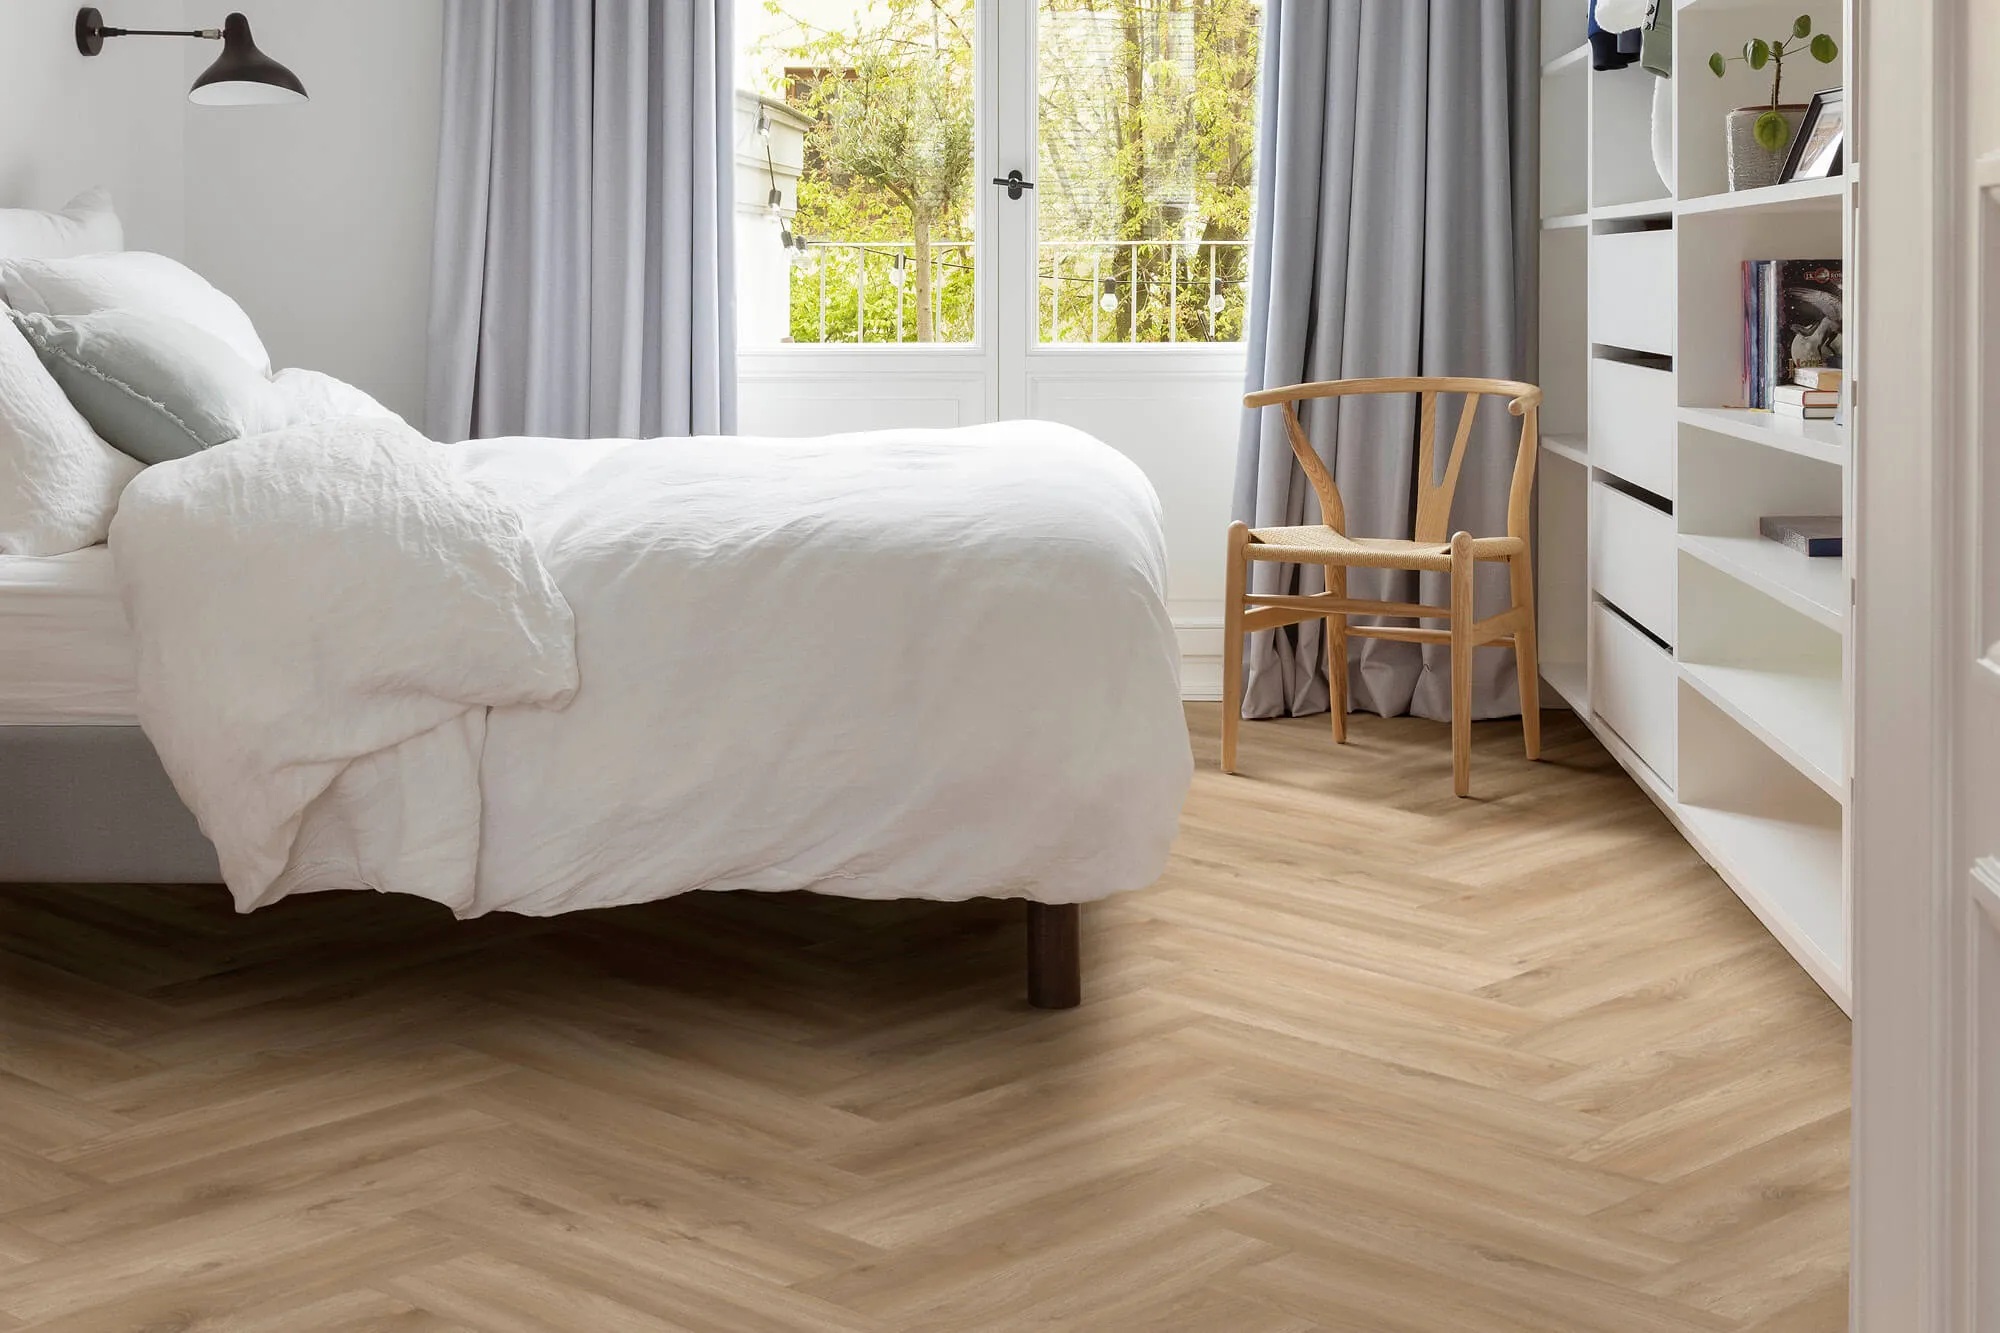
What Is LVT Herringbone Flooring?
LVT (Luxury Vinyl Tile) is a high-performance synthetic flooring product designed to mimic natural materials like wood, stone, or ceramic, while providing enhanced durability, water resistance, and easier maintenance. When arranged in a herringbone pattern — where rectangular planks are laid in a staggered zig-zag design — it creates a sophisticated look reminiscent of classic parquet wood flooring.
This pattern elevates the aesthetic of any space, offering a sense of movement and visual interest that straight-laid planks simply cannot match.
Why Choose Herringbone Pattern?
1. Classic and Timeless Design
The herringbone pattern has been used in flooring for centuries, originally in brick and wood installations. It carries a sense of heritage and craftsmanship that never goes out of style.
2. Enhances Small Spaces
Because of its dynamic visual rhythm, herringbone can make smaller rooms appear larger and more open. The criss-cross layout draws the eye outward, giving a sense of expanded space.
3. Works With Multiple Styles
Whether your decor leans modern, rustic, Scandinavian, or traditional, herringbone LVT can blend seamlessly thanks to its versatile design and wide variety of finishes.
4. Practical and Resilient
Unlike hardwood, LVT is highly resistant to moisture, scratches, and heavy foot traffic — making it ideal for kitchens, bathrooms, entryways, and even basements.
Choosing the Right LVT Herringbone Flooring
When selecting LVT herringbone flooring, you’ll want to carefully consider several factors to ensure your choice suits both aesthetics and performance needs.
1. Material Quality and Wear Layer
The wear layer is the top protective surface of LVT. It determines durability, resistance to scratches, dents, and stains.
-
8–12 mil: Basic residential use
-
12–20 mil: Moderate traffic areas
-
20+ mil: High-traffic residential or commercial spaces
For long-lasting performance, aim for at least a 12 mil wear layer for homes — and 20 mil or more if you expect heavy use.
2. Core Construction: SPC vs. WPC
LVT comes in different core types:
-
SPC (Stone Plastic Composite): Dense and rigid. Excellent for high-traffic areas, very stable against impact and heavy furniture.
-
WPC (Wood Plastic Composite): Softer, more cushioned underfoot. Slightly better acoustics but less rigid than SPC.
Recommendation: SPC is often preferred for herringbone installations due to its stability, especially over larger spaces where alignment precision is critical.
3. Plank Size
Herringbone patterns rely on rectangular planks placed at exact angles, so size matters. Common LVT herringbone plank sizes include:
-
48″ × 6″
-
36″ × 7″
-
24″ × 6″
Tip: Longer, narrower planks create a more modern, elongated look, while shorter planks offer a more traditional vibe.
4. Color and Finish
Choose a color and finish that complements your space:
-
Light tones — visually expand rooms and reflect more light.
-
Medium tones — versatile and forgiving for everyday wear.
-
Dark tones — dramatic and rich but may show dust more easily.
-
Textured finishes — embossed or wire-brushed textures enhance realism and hide wear.
Neutral and natural wood look finishes remain popular, but don’t be afraid to explore gray, whitewashed, or two-tone herringbone layouts for a modern flair.
Design Tips and Room-By-Room Ideas
1. Living Rooms
In large living spaces, herringbone LVT can act almost like an architectural feature — especially if your furniture layout highlights the pattern’s flow. Pair with soft area rugs to define seating zones without hiding the floor completely.
Styling Tip: Place a rug under the front legs of sofas and chairs, allowing the pattern to remain visible around edges.
2. Kitchens
One of the biggest advantages of LVT is water resistance. In kitchens, spill-prone areas benefit from herringbone LVT’s durability. Choose warm, oak-like tones to soften the hard surfaces of cabinetry and stainless steel.
Tip: Consider contrasting grout-colored installation spacers to mimic real wood herringbone without visible seams.
3. Entryways and Hallways
These high-traffic zones are perfect for showcasing herringbone’s directional energy. The angled pattern naturally guides the eye down a hallway or into a room.
Recommendation: Use a tougher wear layer (20 mil+) in entryways to stand up to shoes, bags, and daily traffic.
4. Bathrooms and Basements
Thanks to its water resistance, LVT herringbone is suitable for bathrooms and below-grade spaces where wood wouldn’t be practical.
Caution: In bathrooms, ensure proper waterproofing around toilets, showers, and vanities for best results.
Installation Tips
While many people are familiar with floating installations, herringbone LVT can be installed in several ways — each with pros and cons.
1. Floating Installation
Best For: DIYers
-
Pros: Quick, no glue required, easier to replace
-
Cons: May not feel as solid underfoot
For floating installs, ensure the subfloor is level; even minor irregularities can affect the precision of the herringbone pattern.
2. Glue-Down Installation
Best For: High-traffic and commercial spaces
-
Pros: More stable and secure
-
Cons: Permanent, requires more skill and preparation
Hire a professional if you’re unsure — accurate alignment is key to avoiding distortions in the pattern.
3. Loose Lay
Some LVT products are designed to stay in place due to friction and weight.
-
Pros: Fast, easy to replace
-
Cons: Not ideal for very heavy traffic or uneven floors
Always follow manufacturer instructions for adhesives or underlays to maintain warranties.
Subfloor Preparation
Subfloor preparation is crucial — especially for herringbone, where any bump or dip shows quickly.
-
Ensure flatness: Tolerance of ± 3/16″ per 10 ft or 1/8″ per 6 ft is a good target.
-
Clean and dry: Remove debris, vacuum thoroughly, ensure no moisture issues.
-
Leveling compounds: Self-leveling products help achieve a perfect surface.
-
Remove transitions: For herringbone, avoid too many breaks in the floor; plan transitions to other rooms carefully.
Maintenance & Care Tips
One of LVT’s biggest strengths is low maintenance compared to wood or stone — but simple routines help keep it looking great.
Daily and Weekly Care
-
Sweep or vacuum (soft brush mode) to remove dust and grit.
-
Mop gently with a damp mop and pH-neutral floor cleaner.
-
Avoid wax or oil-based cleaners — these can leave residue.
Handling Spills and Stains
-
Clean spills promptly with a damp cloth.
-
For stubborn spots (e.g., oil or food stains), use a mild cleaner designed for vinyl floors.
Furniture and Rugs
-
Use felt pads under furniture legs to prevent gouging or scratches.
-
Area rugs add style and protect high-use zones. Choose breathable, non-rubber backing to prevent discoloration.
Avoiding Damage
-
Avoid dragging heavy furniture; always lift.
-
High-heeled shoes and pet claws can cause dents — periodic trimming of pet nails helps.
Common Mistakes to Avoid
1. Ignoring Room Layout
Herringbone looks best when aligned with the longest or focal wall. Random placement can make the pattern appear awkward.
Tip: Consider drawing chalk lines or using spacers to map direction before installing.
2. Skipping Underlayment
Even though LVT can be installed directly, proper underlayment adds comfort, reduces noise, and provides moisture barrier benefits.
3. Using the Wrong Wear Layer
Thinner wear layers might save upfront cost but wear out faster — defeating the purpose of “luxury” vinyl.
4. Improper Cleaning Products
Avoid harsh chemicals or steam cleaners — these can damage the wear layer over time.
Cost Considerations
LVT herringbone is generally more expensive than straight-laid vinyl due to the complexity of the pattern and installation time. However, it’s usually less expensive than hardwood parquet while offering superior water resistance and easier maintenance.
Estimated Cost Breakdown:
-
Material cost: Moderate to high (varies with wear layer and design)
-
Professional installation: Typically higher due to pattern precision
-
DIY savings: Possible but requires careful planning and skill
Long term, the durability and lower maintenance often justify the upfront investment.
Sustainable Choices
Many LVT manufacturers are improving environmental performance by:
-
Using recycled content
-
Reducing VOC emissions
-
Offering recyclable products
When selecting your flooring, ask for product specifications and environmental certifications if sustainability is important to you.
Final Recommendations
To ensure you get the best from your LVT herringbone flooring:
✔ Choose a durable wear layer (≥12 mil) for residential use
✔ Prefer SPC core for stability and long life
✔ Carefully plan pattern direction before installation
✔ Prepare a flat subfloor for seamless alignment
✔ Use appropriate cleaning products and soft tools
✔ Protect with rugs and furniture pads
✔ Invest in professional installation if unsure about pattern precision
Conclusion
LVT herringbone flooring blends the classic beauty of traditional parquet with the modern performance of luxury vinyl. It delivers a stunning visual impact while remaining practical, durable, and easy to maintain — perfect for homeowners and designers alike. Whether you’re renovating a living room, updating a kitchen, or reimagining an entire space, herringbone LVT offers a design solution that’s both timeless and on trend.
With the right product selection, careful installation, and routine care, your herringbone floors will not only elevate your interior design but also stand the test of time.